
Installing Python 3 on Mac OS X
If your Mac OS X version is between the above versions, you do not need to install or configure anything else to use Python 2. These instructions document the installation of Python 3.
The version of Python that ships with OS X is great for learning, but it’s not good for development. The version shipped with OS X may be out of date from the official current Python release, which is considered the stable production version.
Doing it Right
Let’s install a real version of Python.
Before installing Python, you’ll need to install GCC. GCC can be obtained by downloading Xcode, the smaller Command Line Tools (must have an Apple account) or the even smaller OSX-GCC-Installer package.
If you already have Xcode installed, do not install OSX-GCC-Installer. In combination, the software can cause issues that are difficult to diagnose.
If you perform a fresh install of Xcode, you will also need to add the commandline tools by running xcode-select —install on the terminal.
While OS X comes with a large number of Unix utilities, those familiar with Linux systems will notice one key component missing: a package manager. Homebrew fills this void.
To install Homebrew, open Terminal or your favorite OS X terminal emulator and run
$ /bin/bash -c "$(curl -fsSL https://raw.githubusercontent.com/Homebrew/install/master/install.sh)"
The script will explain what changes it will make and prompt you before the installation begins. Once you’ve installed Homebrew, insert the Homebrew directory at the top of your PATH environment variable. You can do this by adding the following line at the bottom of your ~/.profile file
export PATH="/usr/local/opt/python/libexec/bin:$PATH"
If you have OS X 10.12 (Sierra) or older use this line instead
export PATH=/usr/local/bin:/usr/local/sbin:$PATH
Now, we can install Python 3:
$ brew install python
This will take a minute or two.
Pip
Homebrew installs pip pointing to the Homebrew’d Python 3 for you.
Working with Python 3
At this point, you have the system Python 2.7 available, potentially the Homebrew version of Python 2 installed, and the Homebrew version of Python 3 as well.
$ python
will launch the Homebrew-installed Python 3 interpreter.
$ python2
will launch the Homebrew-installed Python 2 interpreter (if any).
$ python3
will launch the Homebrew-installed Python 3 interpreter.
If the Homebrew version of Python 2 is installed then pip2 will point to Python 2. If the Homebrew version of Python 3 is installed then pip will point to Python 3.
The rest of the guide will assume that python references Python 3.
# Do I have a Python 3 installed? $ python --version Python 3.7.1 # Success!
Pipenv & Virtual Environments
The next step is to install Pipenv, so you can install dependencies and manage virtual environments.
A Virtual Environment is a tool to keep the dependencies required by different projects in separate places, by creating virtual Python environments for them. It solves the “Project X depends on version 1.x but, Project Y needs 4.x” dilemma, and keeps your global site-packages directory clean and manageable.
For example, you can work on a project which requires Django 1.10 while also maintaining a project which requires Django 1.8.
This page is a remixed version of another guide, which is available under the same license.
Как легко и быстро обновить Python на Mac

Всемогущий эксперт по написанию текстов, который хорошо разбирается в проблемах Mac и предоставляет эффективные решения.
Итак, как обновить Python на Mac? Легкий! Мы вас прикрыли. Python всегда был известным языком программирования, который всегда использовался как новичками, так и опытными программистами.
Последние версии для Mac включают Python 2.7; тем не менее, еще нескольким подписчикам Python, возможно, придется обновить Python в Mac до чего-то вроде обновленной модели, такой как Python 3.8 или даже выше.
В этом посте будут рассмотрены два альтернативных метода для быстрой и простой установки Python 3 на такой Mac, чтобы получить полностью обновленную конфигурацию Python 3. Обновления Python на вашем Mac, а также на iMac могут занять много времени. Вы должны быть знакомы с терминалами Mac, которые также отличаются от Windows cmd.exe. Ниже приведено подробное руководство по обновлению Python на Mac.
Часть 1. Как быстро обновить Python на Mac?
На некоторых типах MacBook Air и других Mac Python может быть установлен, а не через интерфейс. Сначала вы должны снова получить установку Python с веб-страницы python.org.
Выполните следующие шаги, чтобы легко обновить Python на Mac, используя только установщик пакетов Python:
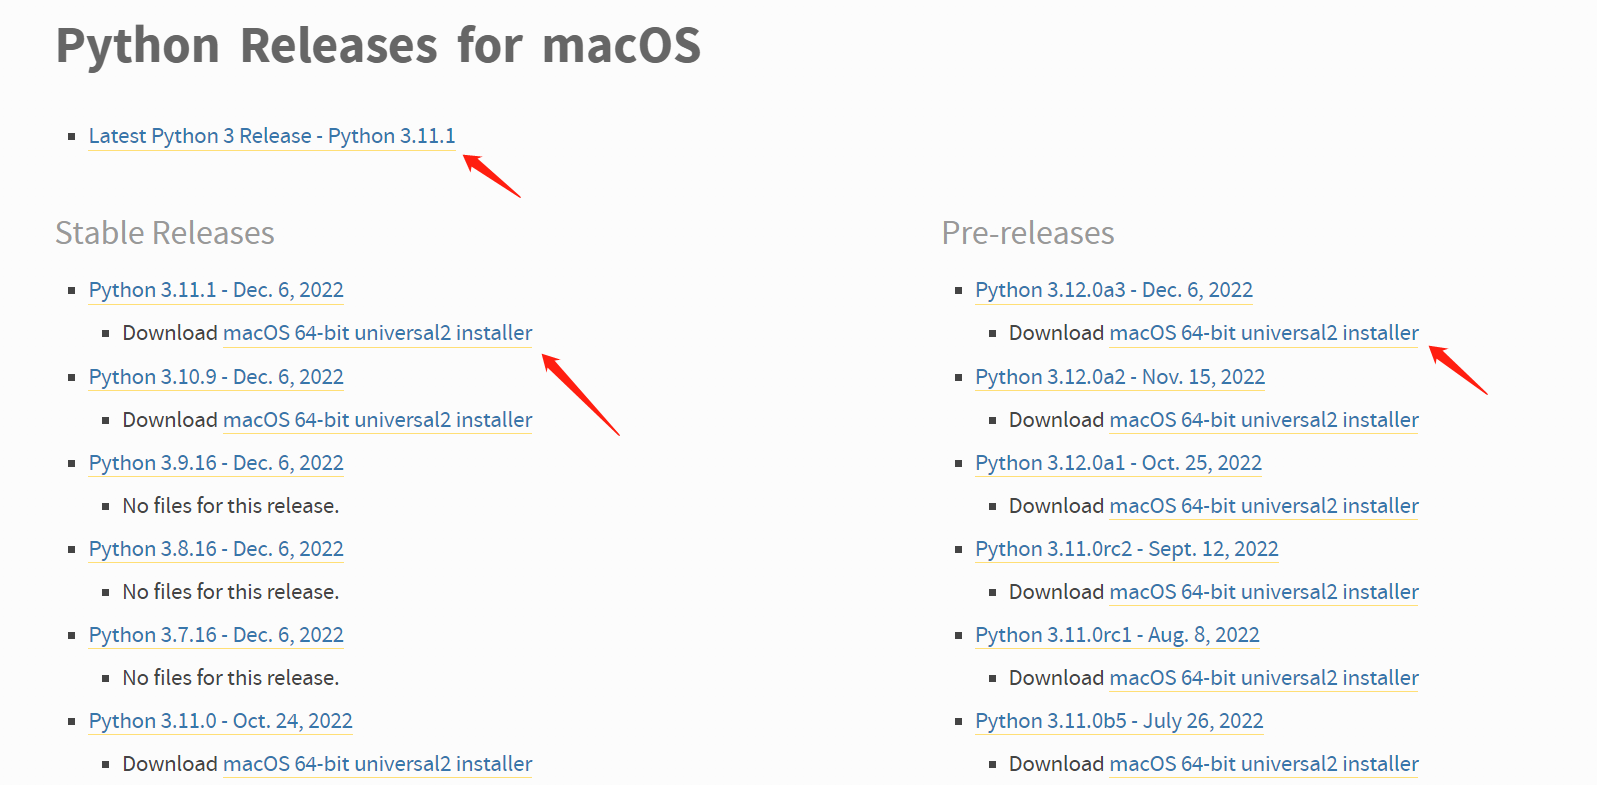
- Пойдите в Главная официальная веб-страница Python.org, а после этого вы должны загрузить последнюю версию установщика файлов Python 3.
- Откройте загруженный установочный файл, чтобы установить Python на свой Mac.
- Следуя процедуре установки которая будет отображаться на экране, будет установлена последняя версия Python, которую вы хотите.
- Теперь вы можете просмотреть папку Python — /Application . Вы можете либо просмотреть IDLE в папке /Application папка. Открыто IDLE.приложение чтобы проверить версию Python и проверить, работает ли она.
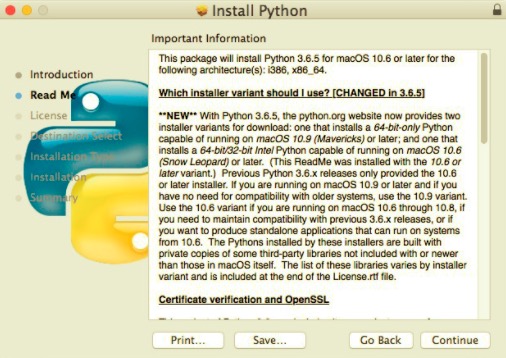
Python 3.8 после установки занимает около 100 мегабайт на жестком диске. Python 3 будет реализован на оборудовании Python 2 в основном на Mac за считанные минуты.
Всякий раз, когда Python был установлен, файлы Python будут создаваться на вашем Mac. /Applications дорожка. Внутри этого /Applications/MacPython3/ папка, вы дополнительно обнаружите IDLE, еще одна скромная IDE, которая предоставляет идентичную Python IDE, которая работает ‘python3‘где-нибудь в командном окне Mac.
Python 3 также можно установить на Mac через Homebrew, что, опять же, всегда было предпочтительным способом только для пользователей Homebrew.
Часть 2. Как установить обновленный Python на Mac с помощью Homebrew?
Вместо того, чтобы знать, как обновить Python на Mac, если вы впервые устанавливаете Python, вам будет легко начать с установки Homebrew.
Вы могли бы установить Homebrew при условии, что вы даже что-то еще не используете в своей компьютерной системе. Одна из таких программ загружает Homebrew в /user/local , устраняя требование » sudo » при запуске установки brew.
Выполните приведенные ниже инструкции, чтобы просто установить обновленный Python с помощью HomeBrew:
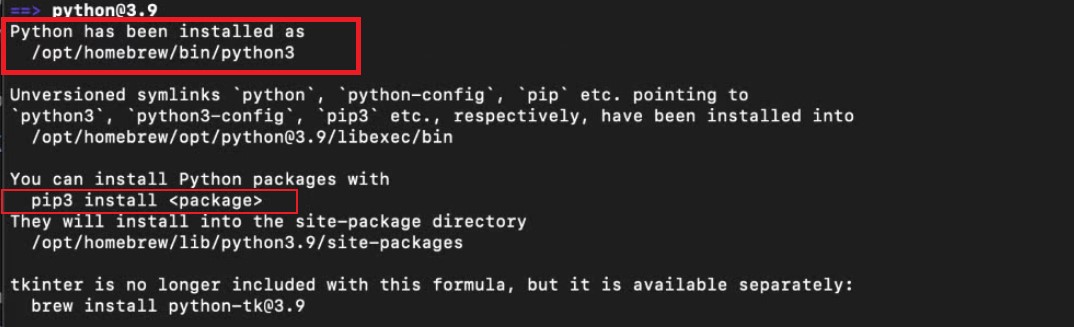
- Выполните эту команду « brew install python »В Терминал.
- После выполнения этой команды на вашем Mac будет установлена последняя версия Python (Python 3) для проверки. вы можете запустить команду python3 —version
- Вы также можете ввести pip3 install на случай, если вы захотите обновить пипс и добавить новую библиотеку.
Как узнать, что вы установили обновленную версию Python?
- В основном, введя терминал в Spotlight Search, вы можете запустить Консоли на вашем Mac. После чего реализуем предложенный контроль: python —version
- Python 2.7 почти всегда установлен на macOS. Получив обновление Python, используйте соответствующую команду для проверки модели: python 3 —version
Просто уведомление о том, что вам не нужно удалять Python 2 или обновлять его с версии 2 до версии 3 в Mac. Вы просто приобретаете последнюю версию, и теперь обе версии Python могут без проблем работать вместе.
Заключение
В этой статье рассказывается, как обновить Python на Mac. Оттуда мы также представили отличное руководство о том, как установить обновленный python на Mac с помощью Homebrew, а также добавили, как вы можете узнать, что вы действительно установили обновленную версию python. Мы надеемся, что это поможет вам в решении проблем обновления на Python.
Если однажды ты подумаешь удалить Python на свой Mac, мы настоятельно рекомендуем вам приобрести этот универсальный инструмент — PowerMyMac, Это помогает тебе полностью удалить любое приложение с Mac одним щелчком мыши. Он не оставит кеш-память удаленных приложений. Если вам это интересно, получите бесплатную пробную версию ниже попробовать! Желаем продуктивного и счастливого дня впереди.
Рейтинг: 4.4 / 5 (на основе 104 рейтинги)
Python на Mac OS
 Admin
Admin  16.09.2020 , обновлено: 01.08.2023
  Python
Установка python на Mac OS.
В Mac OS по умолчанию уже установлен python. Однако его версия прилично отстаёт от последних апдейтов.
Для проверки версии внутри окружения (venv):
python —version
Новую версию установим с помощью Homebrew:
brew install python3
Узнать актуальную версию установленную с помощью Homebrew:
python3 —version
Последующее обновление версий в Homebrew:
brew install python @ 3.8
Убираем симлинки с текущей версии:
brew unlink python
Ставим симлинк на новую версию:
brew link —force python @ 3.10
Error: An unexpected error occurred during the `brew link` step
The formula built, but is not symlinked into /usr/local
Permission denied @ dir_s_mkdir — /usr/local/Frameworks
Error: Permission denied @ dir_s_mkdir — /usr/local/Frameworks
sudo mkdir / usr / local / Frameworks
sudo chown $ ( whoami ) :admin / usr / local / Frameworks
brew link python @ 3.10
Для обновлении версии:
brew upgrade python3
Для обновления env в python:
# Если есть изменения
pip freeze > requirements.txt
# Обновляем
python3 -m venv —upgrade venv
# Или для установки точно последней версии от homebrew
$ ( brew —prefix python ) / bin / python3 -m venv venv
# Активируем окружениие
source venv / bin / activate
pip install —upgrade pip
pip install -r requirements.txt
Для чистого обновления версии можно полностью удалить директорию venv и заново установить туда новый python:
python3 -m venv venv
pip install —upgrade pip
pip install -r requirements.txt
При обновлении на новую версию вполне возможно придется обновить версии модулей:
Installing Python 3.11 on Mac or Windows
The easiest and most obvious (to me) way to install the latest version of Python on either Mac or Windows is:
- Go to python.org
- Hover over the “Downloads” link in the navigation.
- This will detect if you are on Mac or Windows and present you with a button called “Python 3.11.0” (or whatever the latest version is).
- Click that button. This downloads an installer.
- Run the installer.
How long does that take?#
I just did this on my Mac laptop and timed it.
It took a whopping 1 minute 13 seconds to:
- Do everything above
- Open a new terminal window
- Run python3 —version to verify that the new version was installed.
What if I want multiple versions?#
Well, sure. I have multiple versions.
The above instructions put Python here: /Library/Frameworks/Python.framework/Versions/3.11/bin/
In that directory, there’s python3 , which is really a link to python3.11 .
I also have versions of Python 3.10 and 3.7 installed currently, and they respectfully have python3.10 and python3.7 executables. And those are still in my PATH, so I can run them whenever I want.
This also allows me to set up virtual environments using the older versions, if needed. Also, tox, which I use for testing regularly, can see these other versions just fine.
How did Python 3.11 become the default?#
I’m pretty sure it’s because the installer added this snippet to my .zprofile :
# Setting PATH for Python 3.11 # The original version is saved in .zprofile.pysave PATH="/Library/Frameworks/Python.framework/Versions/3.11/bin:$" export PATH I still see older versions in there that I don’t even have installed anymore.
What if I want to update the version?#
Good thinking. My current Python 3.10 is at 3.10.7:
$ python3.10 --version Python 3.10.7 Let’s check for updates:
- Head to python.org/downloads, or just python.org and click on “Downloads” instead of hovering.
- Checking the recent releases, I see that there was a 3.10.8 released on Oct 11, 2022. Great.
- Click “download”. Scroll to the bottom.
- Click the download link for the “macOS blah blah” installer.
- Run that.
Re-run my check from above:
$ python3.10 --version Python 3.10.8 Awesome. That took another minute.
Did updated 3.10 change the default?#
Apparently not, but it’s good to check.
$ python3 --version Python 3.11.0 Of course, if it had, I would just edit .zprofile and move the 3.11 stuff to below the 3.10 stuff.
What about other ways to install Python?#
There are other ways, and I’ve tried many of them.
However, my method takes about 1 minute, and does everything I need. I don’t really need it to be faster.
Some of my thoughts on other ways to install Python:
homebrew If you are already a homebrew user, great. You can use that. But I wouldn’t recommend installing homebrew just to install Python. pyenv pyenv is a tool to manage multiple Python versions. However, it’s not a novice tool. It modifies PATH and uses shims and other methods that can confuse users and other tools. It can install and update Python also, but at a cost of complexity. Bottom line: know what you are doing before attempting pyenv. Not for beginners.
This seems like a Mac tutorial. You said “or Windows”#
Yes. The details of the install path and such are Mac specific in this post.
However, I also run several Windows machines and install there also with the python.org installer.
Changes to the process for Windows:
- When running the installer, hit “Advanced Features” and check “Add Python to environment variables”.
- The executable is python and not python3 .
- I get around this oddity by just setting up an alias in my .zshrc
- py -3.11
- py -3.10
- etc.
So there are details and behind the scenes differences.
However, the installer just works.
I just tested the install on a Windows box and it went really smoothly.
But do rememeber to hit “Advanced Features” and check “Add Python to environment variables”.
Feedback#
Feel free to @ me: @brianokken