
Developing and Debugging PL/SQL using Oracle SQL Developer
This tutorial shows you how to create, run, and debug a PL/SQL procedure using Oracle SQL Developer.
Time to Complete
Approximately 30 minutes.
Overview
Oracle SQL Developer is a free graphical tool that enhances productivity and simplifies database development tasks. With Oracle SQL Developer, you can browse database objects, run SQL statements and SQL scripts, and edit and debug PL/SQL statements. You can also run any number of provided reports, as well as create and save your own. This tutorial focuses on creating, compiling, running and debugging PL/SQL.
Prerequisites
Before starting this tutorial, you should:
Install Oracle SQL Developer 3.0 from OTN. Follow the readme instructions here.
Install Oracle Database 11g with the Sample schema.
Unlock the HR user. Login to SQL Developer as the SYS user and execute the following commands:
alter user hr identified by hr account unlock;
grant debug connect session to hr;
grant debug any procedure to hr
Note: This tutorial is developed using Oracle SQL Developer 3.0. However, you can also use Oracle SQL Developer 2.1.1.
Download and unzip the files.zip to a local folder on your file system. In this tutorial, we use the C:\sqldev3.0 folder.
Creating a Database Connection
The first step to managing database objects using Oracle SQL Developer 3.0 is to create a database connection. Perform the following steps:
If you installed the SQL Developer icon on your desktop, click the icon to start your SQL Developer and move to Step 4. If you do not have the icon located on your desktop, perform the following steps to create a shortcut to launch SQL Developer 3.0 directly from your desktop.
Open the directory where the SQL Developer 3.0 is located, right-click sqldeveloper.exe (on Windows) or sqldeveloper.sh (on Linux) and select Send to > Desktop (create shortcut).
On the desktop, you will find an icon named Shortcut to sqldeveloper.exe. Double-click the icon to open SQL Developer 3.0.
Note: To rename, select the icon and then press F2 and enter a new name.
Your Oracle SQL Developer opens.
In the Connections tab, right-click Connections and select New Connection.
The New / Select Database Connection dialog opens. Enter the connection details as follows and click Test.
Connection Name: HR_ORCL
Username: hr
Password:
Hostname: localhost
Port: 1521
SID:
Check for the status of the connection on the left-bottom side (above the Help button). It should read Success. Click Connect. Then click Save .
The connection was saved and you see the newly created connection in the Connections list.
When a connection is created, a SQL Worksheet is opened automatically. The SQL Worksheet allows you to execute SQL against the connection you have opened. Expand the HR_ORCL connection.
Creating and Compiling a PL/SQL Procedure
In this topic you create, edit, and compile a PL/SQL procedure. Perform the following steps:
Right-click Procedures node in the Connections navigator, to invoke the context menu, and select New Procedure.
Enter EMP_LIST as the procedure name and then click to add a parameter. Double-click Parameters name to allow you to change the value to pMaxRows. Change the type from VARCHAR2 to NUMBER. Click OK.
The procedure is created.
Note: At this point, only the shell of the procedure is completed. In the next step, you add more PL/SQL code into the procedure.
Replace the following PL/SQL:
BEGIN NULL; END EMP_LIST;
with the following code:
(Note: This code is in the file emp_cursor.sql in the directory where you unzipped the files from the Prerequisites section.)
CURSOR emp_cursor IS
SELECT l.state_province, l.country_id, d.department_name, e.last_name,
j.job_title, e.salary, e.commission_pct
FROM locations l, departments d, employees e, jobs j
WHERE l.location_id = d.location_id
AND d.department_id = e.department_id
AND e.job_id = j.job_id;
emp_record emp_cursor%ROWTYPE;
TYPE emp_tab_type IS TABLE OF emp_cursor%ROWTYPE INDEX BY BINARY_INTEGER;
emp_tab emp_tab_type;
i NUMBER := 1;
BEGIN
OPEN emp_cursor;
FETCH emp_cursor INTO emp_record;
emp_tab(i) := emp_record;
WHILE ((emp_cursor%FOUND) AND (i i := i + 1;
FETCH emp_cursor INTO emp_record;
emp_tab(i) := emp_record;
END LOOP;
CLOSE emp_cursor;
FOR j IN REVERSE 1..i LOOP
DBMS_OUTPUT.PUT_LINE(emp_tab(j).last_name);
END LOOP;
END;
Notice how the reserved words are formatted by Oracle SQL Developer. To format the code further, right-click within the code editor to invoke the sub menu and select Format.
Compile the PL/SQL subprogram by clicking Save in the toolbar.
Compile errors, if any, are displayed.
By expanding Procedures on the navigator, EMP_LIST can be viewed.
Note that when an invalid PL/SQL subprogram is detected by Oracle SQL Developer, the status is indicated with a red X over the icon for the subprogram in the Connections Navigator.
Compilation errors are shown in the log window. You can navigate to the line reported in the error by simply double-clicking on the error. Oracle SQL Developer also displays errors and hints in the right hand gutter. If you hover over each of the red bars in the gutter, the error message displays.
In this case, the error messages indicate that there is a formatting error in the LOOP statement. After reviewing the code further, you see an extra parenthesis in the WHILE statement. Delete the extra parenthesis.
Click Compile.
The procedure compiled successfully. You are now ready to run the procedure.
Note: If you still see a red X over the icon for your procedure under the Procedures node, click the refresh icon. A green overlay indicates the procedure has been compiled for debugging. No additional overlay means the procedure has been compiled without additional debugging directives. These are controlled by preference settings and the compile droplist option. The default in SQL Developer is «Compile for Debug».
Running a PL/SQL Procedure
Once you have created and compiled a PL/SQL procedure, you can run it using Oracle SQL Developer. Perform the following steps:
Right-click on EMP_LIST in the Connections navigator and select Run.
This invokes the Run PL/SQL dialog. The Run PL/SQL dialog allows you to select the target procedure or function to run (useful for packages) and displays a list of parameters for the selected target. In the PL/SQL block text area, you will see the generated code that Oracle SQL Developer uses to call the selected program. You can use this area to populate parameters to be passed to the program unit and to handle complex return types.
In your EMP_LIST procedure, you have a parameter named PMAXROWS. In the Run PL/SQL dialog, you can initialize that parameter to any number value.
Change PMAXROWS := NULL ; to PMAXROWS := 5; Then click OK.
The results are displayed in the Running — Log window.
Debugging a PL/SQL Procedure
Oracle SQL Developer also supports PL/SQL debugging with Oracle databases. In this topic, you debug a PL/SQL Procedure, step through the code and modify a value at runtime. Perform the following steps:
To assist with debugging, line numbers can be added to the Code window. Right-click on the margin and select Toggle Line Numbers.
To debug a procedure, you need to Compile for Debug first. This step adds in the compiler directives required for debugging. Once you have completed the debug, you should compile the procedure again and remove the extra directives.
A breakpoint is a location in the code that you identify as a stopping point. When code is run in debug mode, execution will stop at the breakpoint.
Set a breakpoint in the EMP_LIST procedure by clicking in the margin at the line with the OPEN emp_cursor; statement. The line number is replaced with a red dot. This is a breakpoint symbol.
Then click the Debug icon.
The Debug PL/SQL dialog should still show the value PMAXROWS = 5; Click OK.
Click Log tab, if it is not already displayed.
The debugger should halt at the line where you placed the breakpoint. You can now control the flow of execution, modify values of variables and perform other debugging functions. Click Step Into .
Note: You have been granted the DEBUG CONNECT SESSION and DEBUG ANY PROCEDURE user privileges in the Prerequisites section to avoid the following error message when debugging.
This takes you to the first line of the cursor. Click Step Into again.
You should now be selecting the first row of the cursor. Click Step Into 3 more times.
Select Data from the tab above.
The Data window starts to show a limited list of variables which are used in the line of code that is about to be executed, and in the previously executed lines.
Right-click the line that reads DBMS_OUTPUT.PUT_LINE(emp_tab(j).last_name); and select Run to Cursor.
Expand EMP_TAB >_ values > [1] > _value. You see the values of the fields in a given record of the table. Select the LAST_NAME field.
Right-click the LAST_NAME field and select Modify Value.
Change the name to another value, such as James, and click OK.
Select the Debugging — Log tab.
Note that you have changed the value of the variable at run time. This is very helpful in debugging code.
Click Resume to allow the PL/SQL to run to completion.
Check to see that your modified value is displayed in the Log window.
Summary
In this tutorial, you have learned how to:
- Create a Database Connection
- Browse the Database
- Create and Compile a PL/SQL Procedure
- Run a PL/SQL Procedure
- Debug a PL/SQL Procedure
Testing and Debugging Procedures with SQL Developer
This tutorial covers how to execute a DDL script, review changes to the database objects, create, execute, test and debug a procedure.
Time to Complete
Approximately 60 minutes
Introduction
Oracle SQL Developer is a free and fully supported graphical tool that enhances productivity and simplifies database development tasks. Using SQL Developer, users can browse, edit and create database objects, run SQL statements, edit and debug PL/SQL statements, build PL/SQL unit tests, run reports, and place files under version control.
In this tutorial, you use SQL Developer Release 4.1 to examine various tasks.
Prerequisites
Before starting this tutorial, you should:
- Have installed Oracle SQL Developer Release 4.1 or above
- Have access to an Oracle Database 11g database that has the sample schema installed.
- Grant HR user DEBUG CONNECT SESSION and DEBUG ANY PROCEDURE privileges.
- Performed the Re-engineering Your Database Using Oracle SQL Developer Data Modeler 4.1 tutorial.
- Downloaded and unzipped the files.zip into your working directory.
Creating a Database Connection
In this topic, you will create a database connection to the HR Schema in SQL Developer:
- Double click on the SQL Developer icon on the Desktop.
- The first time SQL Developer is open, the «Start Page» is displayed. You can deselect the Show on Startup check box to turn it off.
- In the Connections tab, right click Connections and select New Connection

- Instructions and result (including collapsible image with text file for accessibility):
 Note: In this tutorial the Service Name is specified instead of SID.
 - The status of your test is ‘Success’. Click Connect in the New/ Update Database Connection dialog to create the connection.

- Expand the hr_orcl connection. Notice all the object types. Expand Tables. In the next section, you examine the objects currently in the hr schema.

Review Existing Objects in the HR Schema
In this topic, you review the existing objects in the hr schema.
- Expand the EMPLOYEES table. Notice that the column definitions are listed.

- Click the DEPARTMENTS table in the navigator.
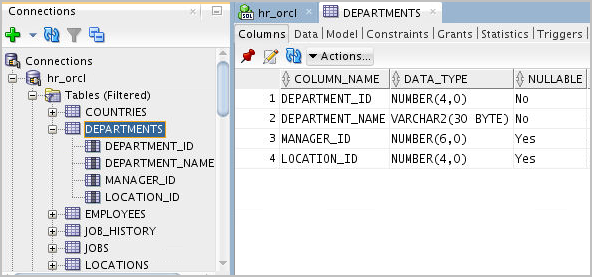
- Notice that the information in the EMPLOYEES tab was replaced by the DEPARTMENTS table information. If you want the table information in the tab to remain frozen, select the Pin icon to Freeze the pane.

- Then click the EMPLOYEES table again in the navigator.

- Notice this time you have 2 tabs, one for each of the tables because the DEPARTMENTS table pane is frozen.

- You can see the data in the EMPLOYEES table. Click the Data subtab.

- The data in the EMPLOYEES table is displayed. You can also enter a SQL statement in the SQL Worksheet. Click the hr_orcl tab.

- Enter the following SQL statement and select the Execute SQL Statement icon. select * from employees
where job_id like ‘%SA%’;
- The Query Results are displayed. In the next topic, you run the script you generated in the previous tutorial on Data Modeler.

Executing a DDL Script
In this topic, you execute the DDL script you generated in the Data Modeler tutorial. If you did not complete the previous tutorial, you can access the solution using the dm_mods.sql in the files folder.
- Select File > Open.

- Locate the dm_mods.sql file and click Open.

- This SQL file contains all the DDL to change the HR Schema so that it is synchronized with the model changes you made in the previous tutorial. When you execute this script, the PROJECTS and TASKS tables will be created, and the new COST_CENTER column will be added to the DEPARTMENTS table. Scroll down to review the DDL.

- Select the hr_orcl connection from the list and click OK.

- All the statements in the DDL script executed successfully

- Click the Refresh icon to refresh the list of tables.

- Notice that the new tables PROJECTS and TASKS are contained in the list. Expand the DEPARTMENTS, PROJECTS and TASKS table nodes and review the results. In the next topic, you create a procedure and run it.

Creating and Executing a Procedure
In this topic, you create, execute and debug a procedure that determines the commission any employee receives based on a sales amount and the employees commission percentage.
- A script with the procedure has already been created so you can open the file. Select File >Open.

- Locate the proc.sql and click Open.

- Click the Run Script icon to create the AWARD_BONUS procedure.

- Select the hr_orcl connection and click OK.
- The procedure was created and compiled with an error. To see the error, expand Procedures in the navigator.

Debugging a Procedure
The procedure created in the earlier section was created with an error. You can locate errors in the code by debugging the code. You have to run a script before you actually start the debug process
Before you Debug
In order to debug a sub program you should have DEBUG privileges.

-
To check the privileges you can execute a SQL statement
You can see that the hr user doesn’t have DEBUG CONNECT and DEBUG privileges


Debugging
- Now open the AWARD_BONUS procedure you created earlier. Compile the procedure
 You can see the error message in the compiler log. It specifies a line number where the error occurred
 - Modify the code in line 13 by adding a semi colon. Select the Compile icon.
 Run the procedure by clicking on Run icon.
 - The Run PL/SQL dialog window appears. Notice that the values for EMP_ID and SALES_AMT are currently set to 1.

- Change the default values to 149 for EMP_ID and 2000 for SALES_AMT and click OK.

- Note that the procedure executed successfully and the value for salary was changed. To see how debug works, you create a break point. Click the line number 7.

- When a break point is created at line 7, the execution will break at line 7 and allows developer to monitor the data held in different variables. Click the Debug icon.

- Click OK to accept the same input values as before.
- The debugger is running and has stopped at line 8. Click the Smart Data tab. The Smart Data tab holds the values of variables in the PL/SQL block. These are currently set to NULL.

- You can see all the data manipulated in the procedure in the Data tab.
 You see that the current values of l_salary and l_commission are NULL.
 - Click the Step Over icon to move to the next statement in the procedure.

- Notice the values for l_salary and l_commission have changed to the existing values in the database, as the execution of select statement is complete, you can see the values from the database are fetched into the variables in the procedure.

- Click the Step Over icon again to move to the next statement.As the execution of the update statement completes, you can see the new values of salary and commission in the Data tab

- Notice that the debugger moved to the next statement in the procedure. You want to run the rest of the procedure, click the Resume icon.

- Procedure execution and debugging is complete. In the next topic, you create a test repository so that you can create and run a unit test.
Creating a Unit Test Repository
In this topic, you create a database user called UNIT_TEST_REPOS. You create this user to hold the Unit Testing Repository data. You will then create the repository in the schema of the user that you created.
- Create a connection for the SYS User. Right-click Connections and select New Connection.

- Enter the following information and click Connect. Connection Name: sys_orcl
Username: sys
Password: oracle
Select Save Password checkbox
Role: SYSDBA
Service Name: pdb1
- Your connection was created successfully. Collapse the hr_orcl connection. Expand the sys_orcl connection and right-click Other Users and select Create User.

- Enter the following information and select the Granted Roles tab. Username: unit_test_repos
Password: oracle
Default Tablespace: USERS
Temporary Tablespace: TEMP
- Select the Connect and Resource roles and click Apply.

- In the Quotas tab, check the Unlimited check box for the USERS tablespace

- The unit_test_repos user was created successfully. Click OK.

- You now need to create a connection to the unit_test_repos user. This user will hold the unit testing repository data. Right-click Connections and select New Connection.

- Enter the following information and click Connect. Connection Name: unit_test_repos_orcl
Username: unit_test_repos
Password: oracle
Select Save Password checkbox
Service Name: pdb1
- The unit_test_repos user and unit_test_repos_orcl connection were created successfully.

- Select Tools >Unit Test >Repository, then select Select Current Repository.

- Select the unit_test_repos_orcl connection and click OK.

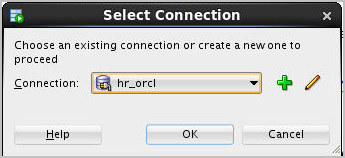
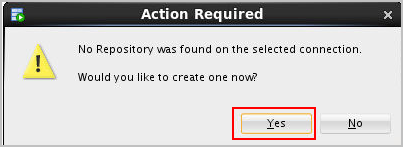
- You would like to create a new repository. Click Yes.
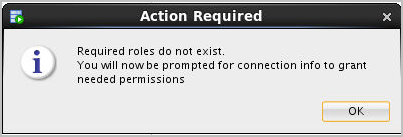
- This connection does not have the permissions it needs to create the repository. Click OK to show the permissions that will be applied.
- Enter oracle for the sys password and click OK.

- The grant statement is shown. Click Yes.

- The UNIT_TEST_REPOS user needs select access to some required tables. Click OK.
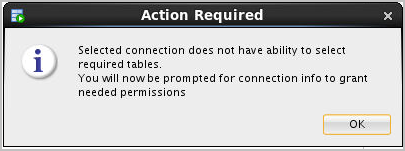
- The grant statements are displayed. Click Yes.

- The UNIT_TEST_REPOS user does not currently have the ability to manage repository owners. Click OK to see the grant statements that will be executed.
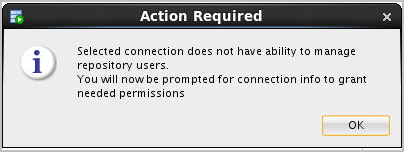
- The grant statements are displayed. Click Yes.

- Your repository was created successfully. Click OK.

Creating and Running a Unit Test
Now that the Unit Testing Repository has been created, you will create a unit test for the PL/SQL procedure you created earlier in this tutorial. Then you will run the unit test to see if various values will work
- Select View >Unit Test.

- In the Unit Test navigator, right-click Tests and select Create Test.

- In Select Operation, select the hr_orcl connection that you used to create the AWARD_BONUS procedure.

- Expand Procedures, select AWARD_BONUS and click Next.

- In Specify Test Name window, make sure that AWARD_BONUS is specified for Test Name and that Create with single Dummy implementation is selected, then click Next.

- In Specify Startup window, click ‘+’ icon and select Table or Row Copy from the drop down list box.

- Enter EMPLOYEES for Source Table and click OK. Note that the table affected by the test will be saved to a temporary table and the query to the table is automatically generated.

- Click Next.
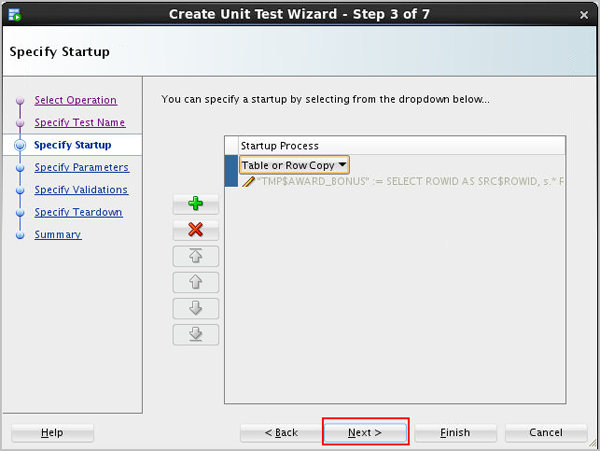
- In the Specify Parameters window, change the Input string for EMP_ID to 149 and SALES_AMT to 2000 and click Next.

- Select the ‘+’ icon to add a validation and select Query returning row(s) from the drop down list.

- Specify the following query and click OK. This query will test the results of the change that the unit test performed.
SELECT * FROM employees
WHERE employee_id = 149
AND salary = 11200;


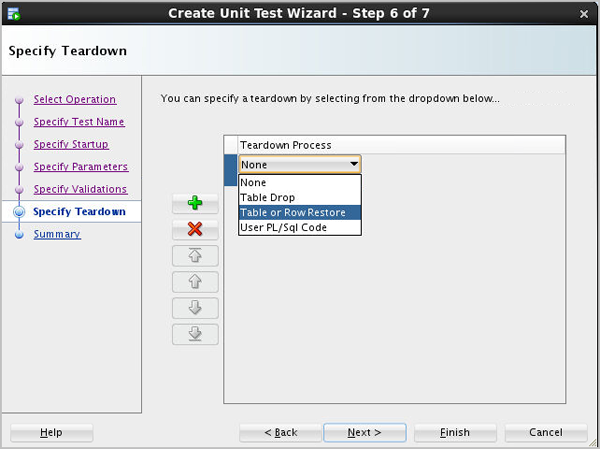


Want to Learn More?
- Oracle SQL Developer Data Modeler on OTN
- Oracle Data Modeling and Relational Database Design course
- Oracle Learning Library
Отладка PL/SQL кода для внешней сессии БД
Периодически Oracle разработчики сталкиваются с проблемой отладки PL/SQL кода, когда код вызывается из веба или среднего слоя(т.е. когда сессия разработчика не совпадает с сессией в которой возникает проблема).
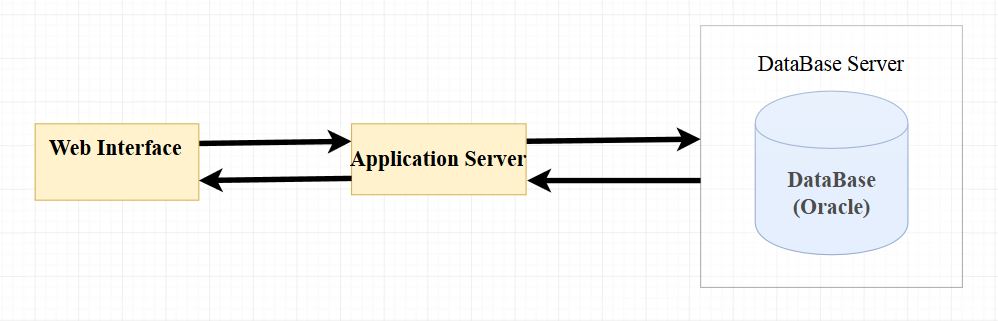
Особенно актуально, если какие-либо проблемы возникают на стороне Web при двухзвенных и трехзвенная схемах взаимодействия БД и Web(ниже пример трехзвенной архитектуры взаимодействия):
Рисунок 1 — Трехзвенная архитектура взаимодействия БД и Web.
Метод решения проблем:
- DBMS_PIPE — Пакет который позволяет отпавлять сообщения(пайпы) между 2мя сессиями БД Oracle.
- DBMS_ALERT — Пакет, который обеспечивает поддержку асинхронных оповещений для различных событий БД Oracle.
Ниже код метода, который мы будем отлаживать при помощи DBMS_PIPE и DBMS_ALERT одновременно:
create or replace procedure checkout_with_pipe_and_alert(p_cycle_size in number) is c_method_error constant number := -20000; c_method_error_message constant varchar2(4000) := 'Cycle size should be > 0'; l_power_value number; l_i_value number := 1; l_pipe pls_integer; begin if p_cycle_size > 0 then for i in 1 .. p_cycle_size loop l_power_value := power(i, 2); l_i_value := l_i_value * i; --Send pipe info l_pipe := dbms_pipe.create_pipe(pipename => 'pipe'); dbms_pipe.pack_message(i || '.l_power_value:=' || l_power_value || ' l_i_value=' || l_i_value); l_pipe := dbms_pipe.send_message(pipename => 'pipe'); --Send alert info dbms_alert.signal(name => 'alert', message => i || '.l_power_value:=' || l_power_value || ' l_i_value=' || l_i_value); end loop; else raise_application_error(c_method_error, c_method_error_message); end if; end checkout_with_pipe_and_alert;При отсутствие грантов на DBMS_PIPE и DBMS_ALERT раздадим их:

Рисунок 2 — Раздача грантов c Oracle сервера схемы SYS на рабочую схему
Отловим сообщения для DBMS_PIPE и DBMS_ALERT при помощи PL/SQL Developer:
Отлавливание сообщений при помощи кода не рассматриваю, т.к. информации достаточно в Oracle DOC и на просторах интернета.
Заходим в Tools→Event Monitor. , в одном окне выбираем тип события «Pipe«, а в другом «Alert» в Event name указываем название пайпы и алерта, которые задали в коде и нажимаем Start:

Рисунок 3 — Настройка окна с Pipe

Рисунок 4 — Настройка окна с Alert
После запуска метода checkout_with_pipe_and_alert из веба/среднего слоя(в нашем случае из другой сессии):
begin checkout_with_pipe_and_alert(5); end;В окнах Pipe и Alert получим следующие результаты:

Рисунок 5 — Результат получения информации от Pipe

Рисунок 6 — Результат получения информации от Alert
- dbms_pipe отличный метод, для отладки pl/sql в разных сессиях, только pipe периодически забивается и приходится использовать метод: dbms_pipe.purge
- dbms_alert я бы не советовал использовать, т.к. периодически теряются сообщения при отладке(как видно из рисунка 6), быть может не правильно его использую. Если кто-то с таким сталкивался, напишите в комментариях и я поправлю статью.
- pl/sql developer
- oracle pl/sql
- отладка
Отладка Процедур и Функций
В SQL Developer можно отлаживать PL/SQL процедуры и функции.
Используя пункты меню Debug, можно выполнять следующие задачи отладки:
- Используйте SQL Developer, чтобы отлаживать PL/SQL функции и процедуры.
- Используйте опцию “Compile for Debug”, чтобы выполнить PL/SQL компиляцию так, чтобы процедура могла быть отлажена.
- Используйте пункты меню Debug, чтобы установить точки останова и выполнять процедуру в режиме шаг с заходом или шаг с обходом.
- Find Execution Point Идет в следующую точку выполнения.
- Resume Продолжает выполнение.
- Step Over Обходит следующий метод и идет к следующему оператору после метода.
- Step Into Переходит к первому оператору в следующем методе.
- Step Out Покидает текущий метод и идет к следующему оператору.
- Step to End of Method Идет к последнему оператор текущего метода.
- Pause Останавливает выполнение, но не выходит, таким образом позволяя Вам возобновить выполнение.
- Terminate Прерывает и выходит из режима выполнения. Невозможно возобновить выполнение из этой точки; вместо этого, чтобы начать выполнение или отладку с начала функции или процедуры, щелкните по значку Run или Debug на панели инструментов вкладки Source.
- Garbage Collection Удаляет недействительные объекты из кэша в пользу наиболее часто используемых и допустимых объектов.
Эти опции также доступны как значки на панели инструментов отладки.
Далее: Сцепленные группирования
Post Views: 681
Похожие записи
Функция Regexp_like
Regexp_like — это функция в SQL, которая используется для проверки соответствия регулярному выражению в столбце или значении в базе данных. Эта функция очень удобна для поиска паттернов, значений, которые начинаются, содержат или заканчиваются определенными символами и т. д. В этой. Читать далее
Тип данных timestamp sql
В SQL, timestamp это тип данных, который представляет собой метку времени. Timestamp предназначен для хранения даты и времени, когда произошло какое-либо событие или изменение в базе данных. В SQL, тип данных timestamp может быть представлен различными способами, в зависимости от. Читать далее
Синтаксис условий и функций регулярных выражений
Рубрика: Поддержка регулярных выражений Условия и функции регулярных выражений имеют следующий синтаксис: source_char: символьное выражение, служащее значением поиска; pattern: регулярное выражение, текстовый литерал; occurrence: положительное целое число, указывающее, какое вхождение шаблона в source_char должен искать сервер Oracle. Значение по умолчанию. Читать далее
Функция TO_TIMESTAMP
Выводит на экран символьную строку ‘2007-03-06 11:00:00’ как значение TIMESTAMP: Функция TO_TIMESTAMP преобразует строку с типом данных CHAR, VARCHAR2, NCHAR или NVARCHAR2 в значение с типом данных TIMESTAMP. Функция TO_TIMESTAMP имеет следующий синтаксис: TO_TIMESTAMP (char,[fmt],[‘nlsparam’]) Необязательный параметр fmt задает. Читать далее
Пример функции REGEXP_COUNT
В примере, показанном на рисунке: acgctgcactgca – источник, в котором выполняется поиск. acg(.*)gca – шаблон, поиск которого выполняется. Осуществляется поиск строкового значения acg, за которым следует gca с возможными символами между acg и gca. Поиск выполняется с первого символа источника. Читать далее
Поиск по шаблону с помощью функции REGEXP_INSTR
В этом примере функция REGEXP_INSTR используется для поиска в адресе улицы местоположения первой буквы независимо от того, является она прописной или строчной. Обратите внимание, что выражение [::] заключает в себе класс символов и соответствует любому символу из этого класса. Выражение. Читать далее
Функция GROUPING
Функция GROUPING: Используется либо с оператором CUBE, либо с оператором ROLLUP Используется для поиска групп, формирующих промежуточные итоги в строке Используется, чтобы отличать хранимые значения NULL от значений NULL, созданных с помощью операторов ROLLUP или CUBE Возвращает 0 или 1. Читать далее
Функция EXTRACT
Отображает компонент YEAR из функции SYSDATE. Отображает компонент MONTH из HIRE_DATE для сотрудников, у которых значение MANAGER_ID равно Выражение EXTRACT извлекает и возвращает значение заданного поля даты-времени из выражения значения даты-времени или интервала. С помощью функции EXTRACT можно извлечь любые. Читать далее
Функции DBTIMEZONE и SESSIONTIMEZONE
Показывает значение часового пояса базы данных: Показывает значение часового пояса сеанса: Администратор базы данных устанавливает часовой пояс по умолчанию для базы данных с помощью предложения SET TIME_ZONE инструкции CREATE DATABASE. При его отсутствии часовой пояс базы данных по умолчанию совпадает. Читать далее
Обзор функций SQL
Существуют два типа функций: однострочные функции; многострочные функции. Однострочные функции Эти SQL функции работают с одиночными строками и возвращают один результат для каждой строки. Существуют различные типы однострочных функций, например символьные, числовые, общие функции, функции дат и преобразования. Многострочные функции. Читать далее