
Install PyCharm
PyCharm is a cross-platform IDE that provides consistent experience on the Windows, macOS, and Linux operating systems.
PyCharm is available in two editions: Professional , and Community . The Community edition is an open-source project, and it’s free, but it has fewer features. The Professional edition is commercial, and provides an outstanding set of tools and features. For more information, refer to the editions comparison matrix.
System requirements
4 GB of free RAM
8 GB of total system RAM
Multi-core CPU. PyCharm supports multithreading for different operations and processes making it faster the more CPU cores it can use.
SSD drive with at least 5 GB of free space
Officially released 64-bit versions of the following:
- Microsoft Windows 10 1809 or later Windows Server 2019 or later
- macOS 10.15 or later
- Any Linux distribution that supports Gnome, KDE , or Unity DE. PyCharm is not available for the Linux distributions that do not include GLIBC 2.27 or later.
Pre-release versions are not supported.
Latest 64-bit version of Windows, macOS, or Linux (for example, Debian, Ubuntu, or RHEL)
You do not need to install Java to run PyCharm because JetBrains Runtime is bundled with the IDE (based on JRE 17).
PyCharm supports the following versions of Python:
- Python 2: version 2.7
- Python 3: from the version 3.6 up to the version 3.12
Install using the Toolbox App
The JetBrains Toolbox App is the recommended tool to install JetBrains products. Use it to install and manage different products or several versions of the same product, including Early Access Program (EAP) and Nightly releases, update and roll back when necessary, and easily remove any tool. The Toolbox App maintains a list of all your projects to quickly open any project in the right IDE and version.
Install the Toolbox App
- Download the installer .exe from the Toolbox App web page.
- Run the installer and follow the wizard steps.
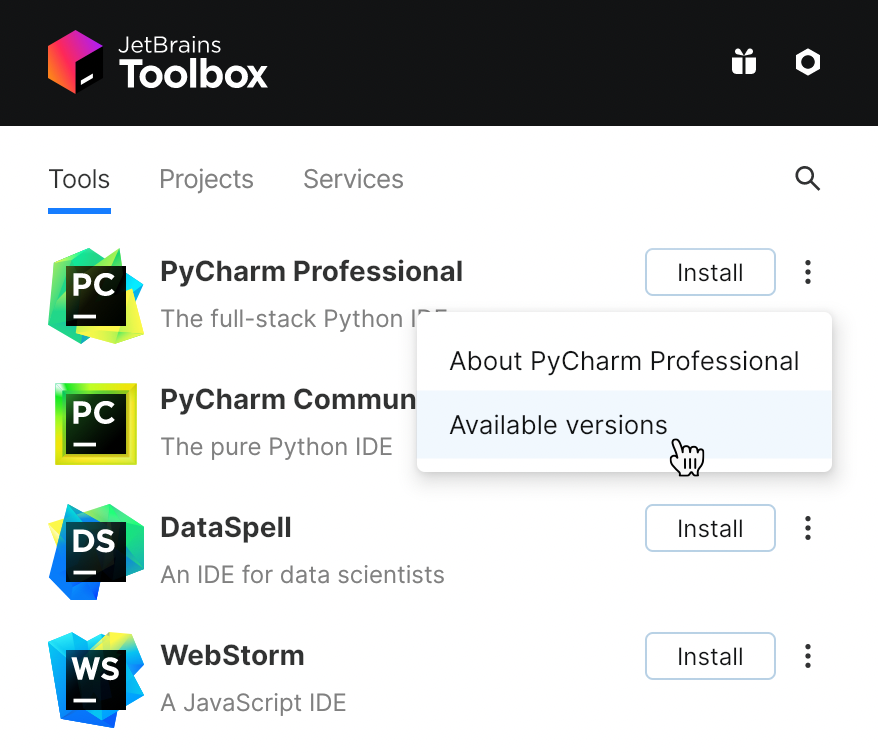
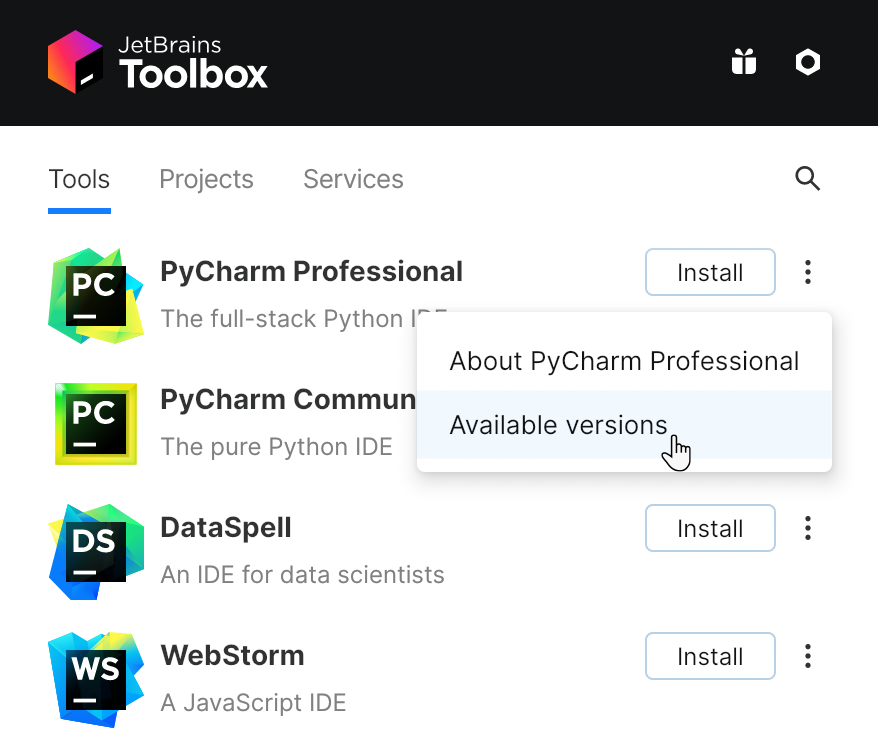
- After you run the Toolbox App, click its icon in the notification area and select which product you want to install. To install a specific version, click and select Available versions .
Log in to your JetBrains Account from the Toolbox App, and it will automatically activate the available licenses for any IDE that you install.
Install the Toolbox App
- Download the disk image .dmg from the Toolbox App web page. There are separate disk images for Intel and Apple Silicon processors.
- Mount the image and drag the JetBrains Toolbox app to the Applications folder.
- After you run the Toolbox App, click its icon in the main menu and select which product you want to install. To install a specific version, click and select Available versions .
Log in to your JetBrains Account from the Toolbox App, and it will automatically activate the available licenses for any IDE that you install.
Install the Toolbox App
- Download the tarball .tar.gz from the Toolbox App web page.
- Extract the tarball to a directory that supports file execution. For example, if the downloaded version is 1.17.7391, you can extract it to the recommended /opt directory using the following command:
sudo tar -xzf jetbrains-toolbox-1.17.7391.tar.gz -C /opt
Log in to your JetBrains Account from the Toolbox App, and it will automatically activate the available licenses for any IDE that you install.
If you installed PyCharm via the Toolbox App, you can find the installation directory in the app: open the settings of the IDE instance in the Toolbox App, expand Configuration , and look for the Install location field.
Standalone installation
Install PyCharm manually to manage the location of every instance and all the configuration files. For example, if you have a policy that requires specific install locations.
- Download the installer .exe . There is a separate installer for ARM64 processors. To verify the integrity of the installer, use the SHA checksum linked from the Download page.
- Run the installer and follow the wizard steps. Mind the following options in the installation wizard
- 64-bit launcher : Adds a launching icon to the Desktop.
- Open Folder as Project : Adds an option to the folder context menu that will allow opening the selected directory as a PyCharm project.
- .py : Establishes an association with Python files to open them in PyCharm.
- Add launchers dir to the PATH : Allows running this PyCharm instance from the Console without specifying the path to it.
To run PyCharm, find it in the Windows Start menu or use the desktop shortcut. You can also run the launcher batch script or executable in the installation directory under bin .
- Download the disk image . There are separate disk images for Intel and Apple Silicon processors. To verify the integrity of the downloaded disk image, use the SHA checksum linked from the Download page.
- Mount the image and drag the PyCharm app to the Applications folder.
Run the PyCharm app from the Applications directory, Launchpad, or Spotlight.
Install using tar archives
- Download the tarball There is a separate tarball for ARM64 processors.
- Unpack the pycharm-*.tar.gz file to a different folder, if your current Download folder doesn’t support file execution:
tar xzf pycharm-*.tar.gz -C
The recommended installation location according to the filesystem hierarchy standard (FHS) is /opt . To install PyCharm into this directory, enter the following command:
sudo tar xzf pycharm-*.tar.gz -C /opt/
cd
For example,
cd /opt/pycharm-2022.2.4/bin
sh pycharm.sh
To create a desktop entry, do one of the following:
- On the Welcome screen, click Configure | Create Desktop Entry
- From the main menu, click Tools | Create Desktop Entry
When you run PyCharm for the first time, you can take several steps to complete the installation, customize your instance, and start working with the IDE.
For more information about the location of the default IDE directories with user-specific files, refer to Directories used by the IDE.
Silent installation on Windows
Silent installation is performed without any user interface. It can be used by network administrators to install PyCharm on a number of machines and avoid interrupting other users.
To perform silent install, run the installer with the following switches:
- /S : Enable silent install
- /CONFIG : Specify the path to the silent configuration file
- /D : Specify the path to the installation directory This parameter must be the last in the command line, and it should not contain any quotes even if the path contains blank spaces.
pycharm-professional.exe /S /CONFIG=d:\temp\silent.config /D=d:\IDE\PyCharm
To check for issues during the installation process, add the /LOG switch with the log file path and name between the /S and /D parameters. The installer will generate the specified log file. For example:
pycharm-professional.exe /S /CONFIG=d:\temp\silent.config /LOG=d:\JetBrains\PyCharm\install.log /D=d:\IDE\PyCharm
Silent configuration file
You can download the silent configuration files for PyCharm at https://download.jetbrains.com/python/silent.config.
The silent configuration file defines the options for installing PyCharm. With the default options, silent installation is performed only for the current user: mode=user . If you want to install PyCharm for all users, change the value of the installation mode option to mode=admin and run the installer as an administrator.
The default silent configuration file is unique for each JetBrains product. You can modify it to enable or disable various installation options as necessary.
It is possible to perform silent installation without the configuration file. In this case, omit the /CONFIG switch and run the installer as an administrator. Without the silent configuration file, the installer will ignore all additional options: it will not create desktop shortcuts, add associations, or update the PATH variable. However, it will still create a shortcut in the Start menu under JetBrains .
See more details on installing PyCharm in the video tutorial:
Install as a snap package on Linux
You can install PyCharm as a self-contained snap package. Since snaps update automatically, your PyCharm installation will always be up-to-date.
To use snaps, install and run the snapd service as described in the installation guide.
On Ubuntu 16.04 LTS and later, this service is pre-installed.
PyCharm is distributed via two channels:
-
The stable channel includes only stable versions. To install the latest stable release of PyCharm, run the following command:
Пошаговая установка PyCharm
JetBrains PyCharm — это интегрированная среда разработки (IDE), используемая для написания программ на Python. В ней есть инструменты для анализа кода, графический отладчик, встроенное модульное тестирование и поддержка веб-разработки с Django.
Для установки PyCharm сперва нужно установить интерпретатор Python. Дальше — пошаговый процесс установки PyCharm.
- Перейдите на сайт JetBrains https://www.jetbrains.com/pycharm/. PyCharm — это проект JetBrains.

- Нажмите «Download». Произойдет перенаправление на страницу загрузки PyCharm.
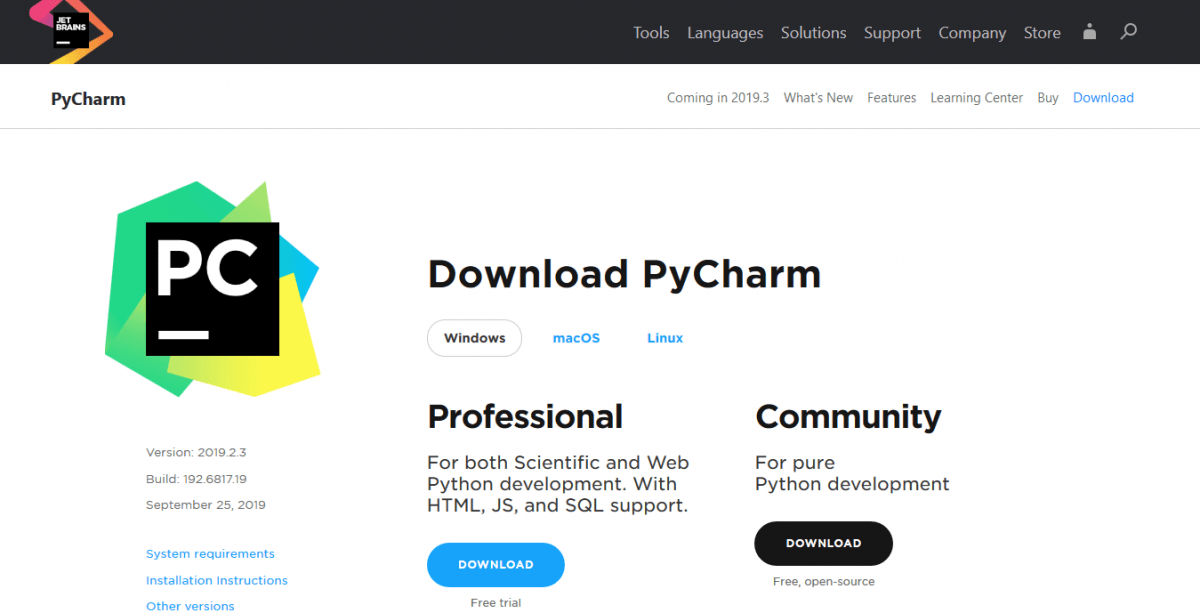
- Дальше необходимо выбрать версию PyCharm: Community или Professional. Professional — это платная версия с полным набором функций. Она идеально подходит для профессиональной разработки. Community бесплатная. Ею можно пользоваться благодаря набору базовых возможностей. После нажатия на кнопку «Загрузить» скачивание начнется автоматически.
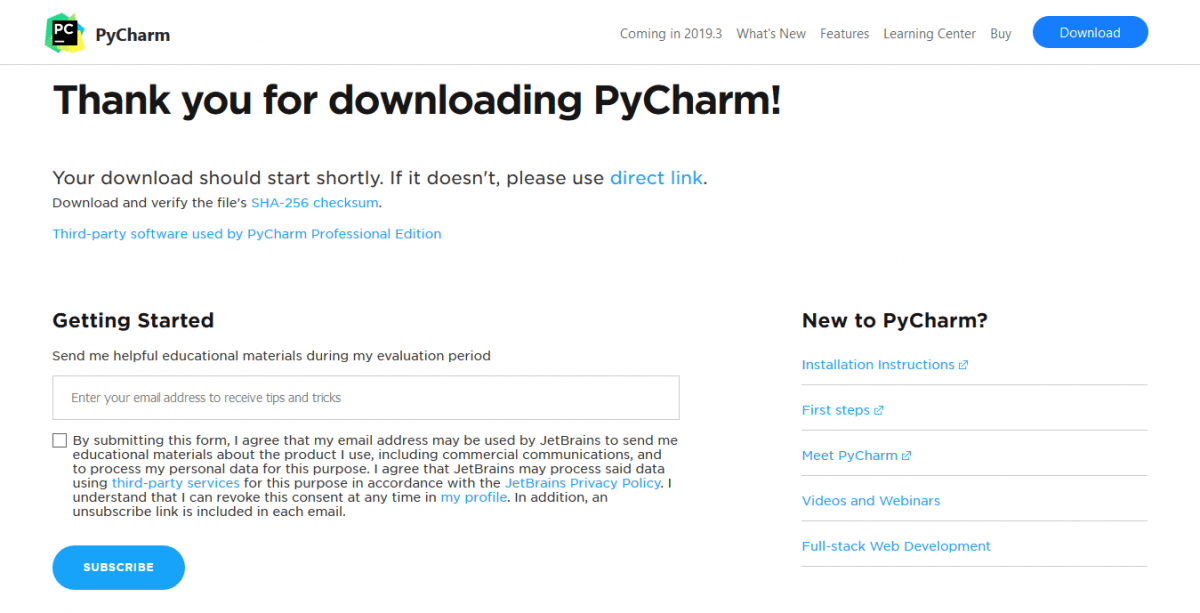
- Теперь необходимо запустить установку (~ pycharm-community-2019.2). Нажмите «Next».
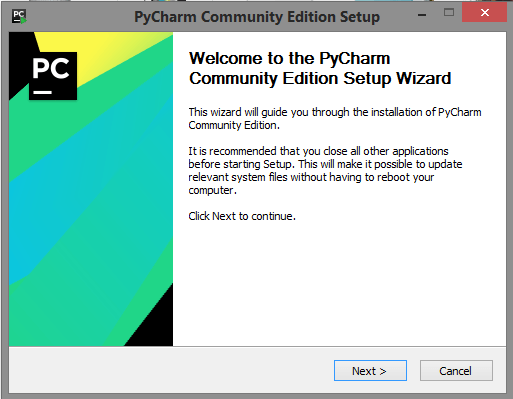
В статье используется версия pycharm 2019.2. Во время прочтения может быть выпущена новая версия. Учитывайте это, часть 2019.2 может быть любой.
- Оставьте папку установки по умолчанию. Это папка C:\Program files(x86)\JetBrains\PyCharm Community Edition 2019.2 . Если выбрана другая, лучше указать именно это направление. Нажмите «Next».
- Поставьте галочки напротив обоих пунктов, если нужен ярлык для рабочего стола. Нажмите «Next».
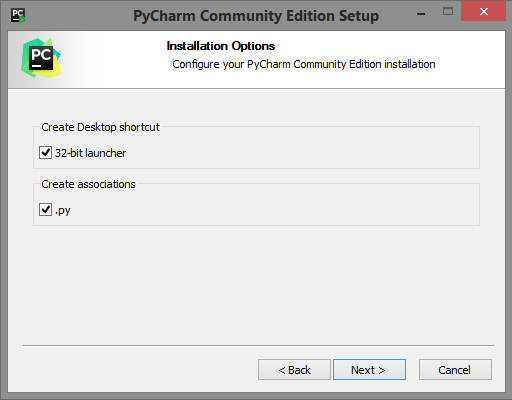
- Далее установщик попросит указать имя для отображения в стартовом меню. По умолчанию это JetBrains. Нажмите «Install».
- Установка начнется автоматически. Дождитесь завершения.
- После завершения установки поставьте галочку напротив «Run PyCharm Community Edition» для запуска, а затем «Finish».
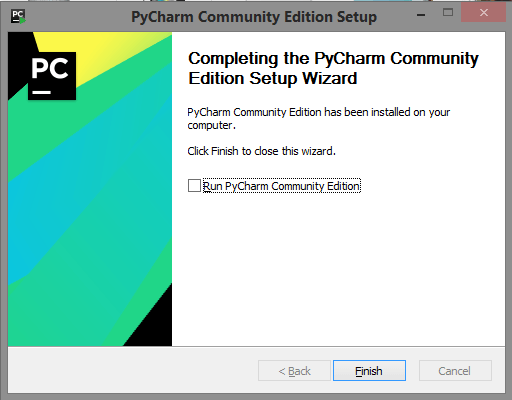
- Если вы только учите язык Python и установили PyCharm впервые, тогда выберите пункт «I do not have a previous version of PyCharm or I do not want to import my settings» и «ОК».
- PyCharm запустится. Первый раз этой займет больше времени.
- После приветственного окна нажмите «Create New Project».
- Выберите директорию для сохранения проекта. Во втором поле нужно указать местоположение интерпретатора Python (который уже должен быть установлен). Обычно PyCharm находит его самостоятельно. Если не удалось, нужно указать путь к нему и нажать «Create».

- Нажмите «File > New > Python File». Введите название нового файла. Он откроется с чистой консолью. Можно начинать писать программу для проверки. Напишите что-то простое: например, программу, которая выводит «Hello World!» на экран. Используйте этот код, чтобы проверить работу PyCharm.
print("Hello World!") В любом месте кликните правой кнопкой мыши и выберите «Run». Программа выполнится, а вывод будет показан на экране. Это значит, что PyCharm установлен и готов к работе. Удачи и успехов в изучении Python.
Установка Python и PyCharm на Windows 11

Скачать Python можно с официального сайта по ссылке https://www.python.org/downloads/ Ссылка для скачивания PyCharm: https://www.jetbrains.com/pycharm/download/?section=windows ******************************** ● Поддержать канал (от 10 руб.): https://www.donationalerts.com/r/kolyaxaxa ● Telegram: https://t.me/it_kolyaxaxa ● ВК: https://vk.com/kolyaxaxa_yt ● Ютуб: https://www.youtube.com/@kolyaxaxaxa/videos ******************************** Мой ПК: ● Процессор: AMD Ryzen 3 3200G with Radeon Vega Graphics 3.60 GHz ● Материнская плата: Asus B450M-K ● Видеокарта: Nvidia GTX 1650 D6 WINDFORCE OC 4G 4 Gb ● ОЗУ — 16 Gb ● SSD — 256 Gb ******************************** Программы, в которых я работаю: ● OBS Studio ● Adobe Photoshop CC 2017 ● Adobe Premiere Pro CC 2017 ● PyCharm ● PHP Storm ******************************** Спасибо за просмотр!
Показать больше
Войдите , чтобы оставлять комментарии.
Урок 3. Установка Python в Windows
Для успешного прохождения курса нам нужно установить две программы: Первая — это непосредственно сам Python, а вторая система разработки Pycharm.
Начнем с Питона. Откроем в браузере официальный сайт python.org.
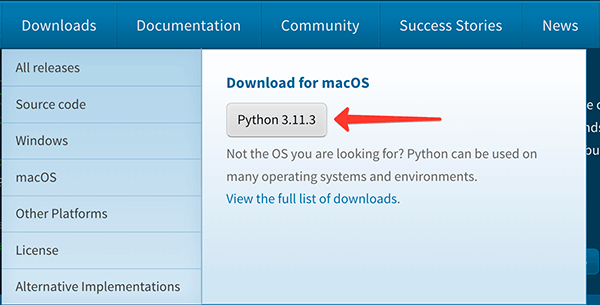
После открытия сайта нужно навести на пункт меню Downloads и в выпадающем окошке нажать на кнопку Python 3.11, чтобы начать скачивание. Если к этому моменту уже вышла более новая версия Python, то скачивайте её. Главное, чтобы это был Python 3, а отличия в других цифрах для начинающих разработчиков не так важны:
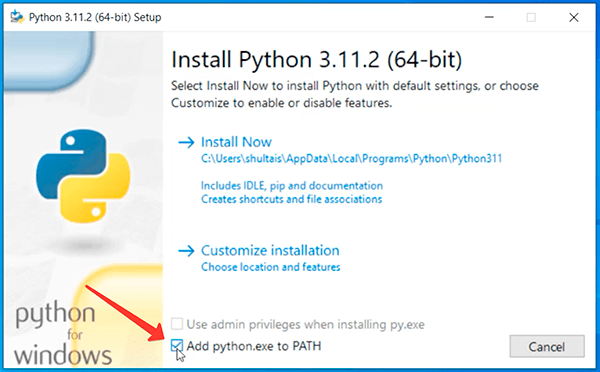
После скачивания, необходимо запустить установщик и первым делом отметить галочку «Add Python to Path». Это важно.
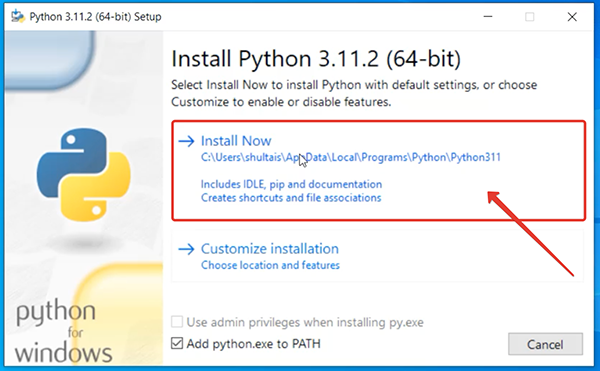
А затем нажть на Install Now:
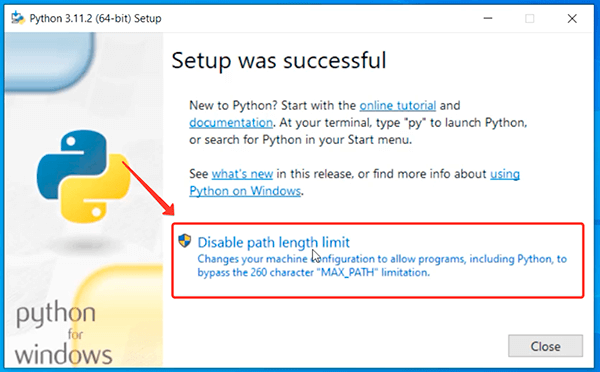
После окончания установки, вам может быть предложено снять ограничение на длину пути. Это сообщение появляется не всегда, но если появилось, то просто нажмите на «Disable Path length limit»:
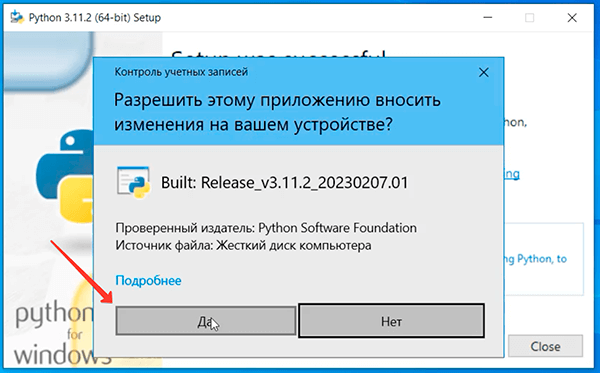
Если вы устанавливаете Python от имени обычного пользователя, без администраторских прав, то скорее всего вам придется ввести пароль администратора для дальнейшей работы, в противном случае появится стандартное окно, где просто нужно нажать Да:
Готово. Установка Python полностью завершена и можно закрывать установщик.
Теперь давайте проверим всё ли работает. Для этого наберем в строке поиска cmd и откроем командную строку:
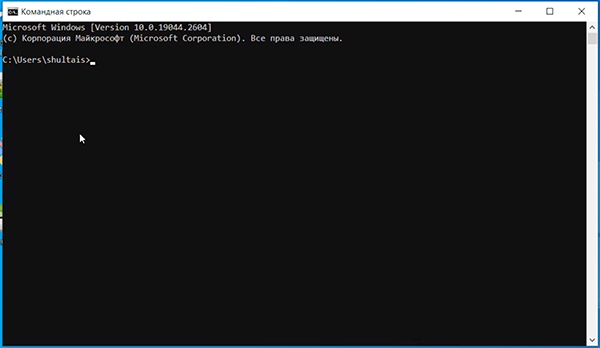
Если командная строка была открыта до того, как вы установили Python, то её следует закрыть и открыть снова, чтобы она обновила пути.
В командной строке вы увидите мигающий курсор и это ожидание ввода команды. Необходимо ввести:
python --versionНажмите Enter и после вы увидите версию только что установленного Питона.
Что запустить Python надо ввести в командной строке слово python и опять нажат Enter:
pythonПосле этого вы окажитесь в интерактивной оболочке Python и снова увидите мигающий курсор, но на это раз он ожидает ввода python-команд.
>>> 10 + 20И нажмите Enter. Python провдеет вычисления и напечатает 30. После этого он снова выведет три стрелочки и мигающий курсор в ожидании новой команды. Собственно интерактивная оболочка и называется интерактивной, так как позволяет сразу получать и видеть результаты наших действий.
Можете попробовать понабирать разные арифметические выражения, сложение вычитание, умножение или деление, чтобы посмотреть, как это работает.
На практике интерактивную оболочку нередко используют в качестве калькулятора. А также для проведения микроэкспериментов с кодом. Немного позже мы познакомимся с документацией Python, где большая часть примеров как раз приведена для выполнения в интерактивной оболочке.
Когда же вам надоест, то вы можете выйти из неё с помощью команды:
>>> exit()Enter. Мы снова в командной строке Windows. Отлично.
Что ж, с установкой Python мы закончили, а в следующем уроке рассмотрим, как установить PyCharm — программу, которая облегчит нам создание настоящих Python программ.
Следующий урок
Урок 4. Установка PyCharm в Windows
В этом уроке вы научитесь устанавливать IDE PyCharm в Windows и запустите свою первую программу.
Полный курс с практикой
- 146 уроков
- 303 задания
- Сертификат
- Поддержка преподавателя
- Доступ к курсу навсегда
- Можно в рассрочку